John Lewis JLDWW1206 User Manual
Browse online or download User Manual for Dishwashers John Lewis JLDWW1206. JOHN LEWIS JLDWW1206 User Manual [de]
- Page / 36
- Table of contents
- BOOKMARKS
- JLDWW 1206 1
- Dishwasher 1
- Instruction manual 1
- Important safety information 2
- Correct use 3
- General safety 3
- Ecological hints 3
- Environmental 4
- Contents 5
- Description of the appliance 6
- Control panel 7
- Menu options 8
- Washing programmes 9
- When the dishwasher is first 10
- The water softener 11
- Setting the water 11
- Setting manually 11
- Setting electronically 11
- Filling with rinse aid 12
- Filling with dishwasher 12
- Adjusting the rinse aid 13
- Daily use 14
- The lower basket 15
- The cutlery basket 15
- The upper basket 16
- Adjusting the height of 17
- Use of detergent 18
- Fill with detergent 18
- Multi tab function 19
- Select and start a washing 20
- Unloading the dishwasher 22
- Maintenance and cleaning 22
- External cleaning 23
- Internal cleaning 23
- Prolonged periods of non 23
- Something not working 24
- Technical data 27
- Installation 27
- Levelling 28
- Water connections 29
- Electrical connection 31
- Repairs - after sales service 31
- Spare parts 32
- John Lewis Partnership 36
- 171 Victoria Street 36
- London SW1E 5NN 36
Summary of Contents
JLDWW 1206DishwasherInstruction manual
Half load option available with programme:GLASSYES (no impact on washing programme)RINSE HOLDYES (no impact on washing programme)Consumption valuesPro
The water softenerThe dishwasher is equipped with a watersoftener designed to remove minerals andsalts from the water supply, which would havea detrim
With the help of the chart, set the level of thewater softener according to the hardness ofthe water in your area.Filling with dishwashersaltWarning!
2. Add the rinse aid in the container. Themaximum level for filling is indicated by'max'.The dispenser holds about 110 ml of rinseaid, which
Daily use• Check if it's necessary to refill withdishwasher salt or rinse aid.• Open the door and slide out the baskets toload the dishes.• Load
The lower basketThe lower basket is designed to takesaucepans, lids, plates, salad bowls, cutlery,etc.Serving dishes and large lids should bearranged
Mix spoons with other cutlery to preventthem from sticking together.For best results we recommend you use thecutlery grids. If the size and dimensions
For glasses with long stems (according to thesize and dimensions), set the glass holder tothe left or right position.The central rows of prongs can be
Warning! After loading yourmachine always close the door, as anopen door can be a hazard.Use of detergentOnly use detergents specificallydesigned for
Detergent tabletsDetergent tablets from differentmanufacturers dissolve at differentrates. For this reason, some detergenttablets do not attain their
Important safety informationIt is most important that this instruction book should be retained withthe appliance for future reference. Should the app
If the drying results are notsatisfactory we suggest that you:1. Fill up the rinse aid dispenser withrinse aid.2. Activate the rinse aid dispenser.3.
The countdown will decrease in steps of1 hour.Opening the door will interrupt thecountdown. Close the door; thecountdown will continue from the point
Unloading the dishwasher• Hot dishes are sensitive to knocks. Thedishes should therefore be allowed to cooldown before removing from the appliance.• E
4.Take hold of the coarse filter (A) by thehandle with the hole and remove from themicrofilter (B) .5. Clean all filters thoroughly under runningwater
Frost precautionsAvoid placing the machine in a location wherethe temperature is below 0°C. If this isunavoidable, empty the machine, close theapplian
Fault code and malfunction Possible cause and solution•intermittent audible signal is active1)• appears in the digital display•message SERVICE NUMBERd
The wash results are not satisfactoryThe dishes are wet and dull• Rinse aid was not used.• The rinse aid dispenser is empty.There are streaks, milky s
Technical dataDimensions WidthHeightDepth60 cm85 cm61 cmElectrical connection - Voltage - Overallpower - FuseInformation on the electrical connection
Proceed as follows:Remove the machine’s worktop byunscrewing the two rear retaining screws (1),pull the worktop from the back of the machine(2) and sl
Water connectionsWater inlet connectionThis appliance must be connected to a coldwater supply.For making the connection itself, the couplingnut fitted
• Keep all packaging well away from children.There is a risk of suffocation.• Keep all detergents in a safe place out ofchildren’s reach.• Keep childr
Our appliances are supplied with asecurity device to protect against thereturn of dirty water back into themachine. If the spigot of your sink hasa &q
Electrical connectionWarning! Safety standards requirethe appliance to be earthed.Prior to using the appliance for the firsttime, ensure that the rate
They will give you details for your local Serviceengineer. Before calling out an engineer,please ensure you have read the details underthe heading “So
John Lewis Partnership171 Victoria StreetLondon SW1E 5NNwww. johnlewis.com117971591 - 01 - 022008 - Subject to change without notice
• Do not use more detergent, dishwashersalt and rinse aid than is recommended inthese operating instructions and by themanufacturer of the respective
ContentsFor the userImportant safety information 2Description of the appliance 6Control panel 7Menu options 8Washing programmes 9When t
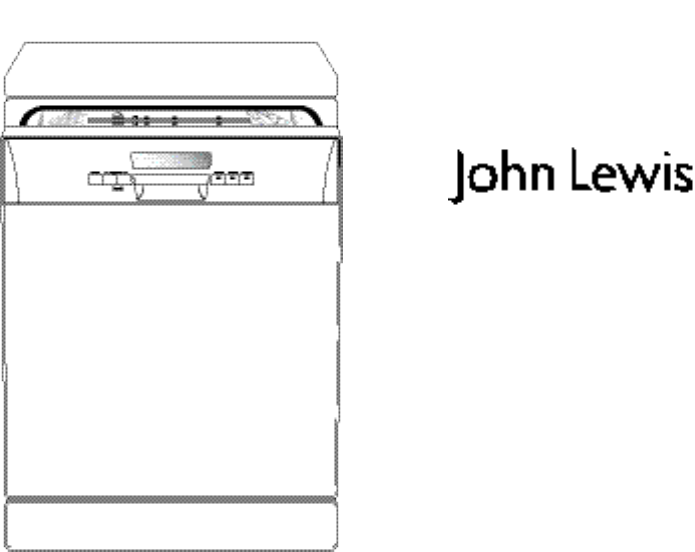
Description of the appliance1. Upper basket2. Water hardness dial3. Salt container4. Detergent dispenser5. Rinse aid dispenser6. Rating plate7. Filter
Control panel1. On/Off button2. Programme scrolling buttons3. Multi tab button4. Half load button5. Delay start button6. DisplayA sequence of displaye
Menu optionsSetting an option is possible ONLY with theappliance in setting mode.The message CHOOSE PROGRAMMEon the display indicates that the applian
Washing programmesProgramme Degree of soil Type of load Programme description70°INTENSIVEHeavy soilCrockery,cutlery, pots andpansPrewashMain wash2 int
More documents for Dishwashers John Lewis JLDWW1206


Related products and manuals for Dishwashers John Lewis JLDWW1206
 (36 pages)
(36 pages)
(32 pages)
(32 pages)
(32 pages)
(40 pages)
(36 pages)
(36 pages)
(36 pages)
(32 pages)
(28 pages)
(36 pages)
(36 pages)
(36 pages)
(36 pages)
(32 pages)
(32 pages)
(32 pages)
(40 pages)
(36 pages)
(36 pages)
(36 pages)
(32 pages)
(28 pages)
(36 pages)
© 2020, manymanuals.com. All rights reserved. | 3.597 s |
 Manymanuals.com
 Manymanuals.de
 Manymanuals.fr
 Manymanuals.it
 Manymanuals.pl
 Manymanuals.cz
 Manymanuals.es
 Manymanuals-pt.com
Comments to this Manuals